a las
0:30
GNS3 Lab: Configuración de SSH (Secure SHell) en GNS3
El primer paso es configurar la interface de bucle invertido con la dirección IP 192.168.1.2 y mascara de subred 255.255.255.0. Hecho lo anterior ahora agregamos un Router y una Nube (Interface de Bucle Invertido) en GNS3 y los conectamos con un cable FastEthernet. Iniciamos el Router (R1) dando clic derecho - "Inicio", una vez mas hacemos clic derecho para abrir la "consola" y ya que hallamos realizado estos pasos, el router comenzara a descomprimir el IOS.

Connected to Dynamips VM "R1" (ID 0, type c3725) - Console port
Smart Init is disabled. IOMEM set to: 5
                         Using iomem percentage: 5
Restricted Rights Legend

Use, duplication, or disclosure by the Government is
subject to restrictions as set forth in subparagraph
(c) of the Commercial Computer Software - Restricted
Rights clause at FAR sec. 52.227-19 and subparagraph
(c) (1) (ii) of the Rights in Technical Data and Computer
Software clause at DFARS sec. 252.227-7013.

cisco Systems, Inc.
170 West Tasman Drive
San Jose, California 95134-1706

Cisco IOS Software, 3700 Software (C3725-ADVENTERPRISEK9-M), Version 12.4(15)T5, RELEASE SOFTWARE (fc4)
Technical Support: https://www.cisco.com/techsupport
Copyright (c) 1986-2008 by Cisco Systems, Inc.
Compiled Wed 30-Apr-08 18:27 by prod_rel_team
Image text-base: 0x60008930, data-base: 0x6363A000

Use format command to format the card as DOS File System.
Or use erase command to format the card as Low End File System.

This product contains cryptographic features and is subject to United
States and local country laws governing import, export, transfer and
use. Delivery of Cisco cryptographic products does not imply
third-party authority to import, export, distribute or use encryption.
Importers, exporters, distributors and users are responsible for
compliance with U.S. and local country laws. By using this product you
agree to comply with applicable laws and regulations. If you are unable
to comply with U.S. and local laws, return this product immediately.

A summary of U.S. laws governing Cisco cryptographic products may be found at:
https://www.cisco.com/wwl/export/crypto/tool/stqrg.html

If you require further assistance please contact us by sending email to
export@cisco.com.

Cisco 3725 (R7000) processor (revision 0.1) with 124928K/6144K bytes of memory.
Processor board ID XXXXXXXXXXX
R7000 CPU at 240MHz, Implementation 39, Rev 2.1, 256KB L2, 512KB L3 Cache
2 FastEthernet interfaces
DRAM configuration is 64 bits wide with parity enabled.
55K bytes of NVRAM.
16384K bytes of ATA System CompactFlash (Read/Write)
Installed image archive

SETUP: new interface FastEthernet0/0 placed in "shutdown" state
SETUP: new interface FastEthernet0/1 placed in "shutdown" state

Press RETURN to get started!

echsupport
Copyright (c) 1986-2008 by Cisco Systems, Inc.
Compiled Wed 30-Apr-08 18:27 by prod_rel_team
*Mar  1 00:00:22.995: %SNMP-5-COLDSTART: SNMP agent on host R1 is undergoing a cold start
*Mar  1 00:00:23.319: %CRYPTO-6-ISAKMP_ON_OFF: ISAKMP is OFF
*Mar  1 00:00:23.319: %CRYPTO-6-GDOI_ON_OFF: GDOI is OFF
R1>
Ya que el router se halla iniciado correctamente, le configuraremos una IP 192.168.1.1 con mascara de subred 255.255.255.0 y probamos la conectividad haciendo un ping a la interface loopback.
R1> en
R1# conf t
Enter configuration commands, one per line.  End with CNTL/Z.
R1(config)# int f0/0
R1(config-if)# ip address 192.168.1.1 255.255.255.0
R1(config-if)# no shut
R1(config-if)# end
*Mar  1 00:00:56.195: %LINK-3-UPDOWN: Interface FastEthernet0/0, changed state to up
*Mar  1 00:00:57.195: %LINEPROTO-5-UPDOWN: Line protocol on Interface FastEthernet0/0, changed state to up
R1# show ip int brief
Interface                  IP-Address      OK? Method Status                Protocol
FastEthernet0/0            192.168.1.1     YES manual up                    up
FastEthernet0/1            unassigned      YES unset  administratively down down
R1#
R1# ping 192.168.1.2
Type escape sequence to abort.
Sending 5, 100-byte ICMP Echos to 192.168.1.2, timeout is 2 seconds:
.!!!!
Success rate is 80 percent (4/5), round-trip min/avg/max = 20/58/92 ms
R1#
Ahora empezamos a configurar SSH, para esto primero tenemos que hacer, es crear un nombre de dominio.
R1# conf t
Enter configuration commands, one per line.  End with CNTL/Z.
R1(config)# enable secret cisco
R1(config)# ip domain-name delfirosales.com
Generar el certificado RSA con un tamaño entre el rango de 360-2048. En este ejemplo se muestra con el tamaño de 1024.
R1(config)# crypto key generate rsa general-keys modulus 1024
The name for the keys will be: R1.delfirosales.com

% The key modulus size is 1024 bits
% Generating 1024 bit RSA keys, keys will be non-exportable...[OK]

R1(config)#
*Mar  1 00:01:36.367: %SSH-5-ENABLED: SSH 1.99 has been enabled
Algunos detalles adicionales como el configurar el tiempo de inactividad para la sesión, el numero de veces que uno puede fallar al intentarse logearse.
R1(config)# ip ssh time-out ?
<1-120>  SSH time-out interval (secs)
R1(config)# ip ssh time-out 60
R1(config)# ip ssh authentication-retries 3
Configurar los protocolos permitidos en las lineas VTY.
R1(config)# line vty 0 4
R1(config-line)# login local
R1(config-line)# transport input ssh telnet
R1(config-line)# exit
R1(config)#
Crear un usuario y contraseña
R1(config)# username delfirosales password cisco
R1(config)# exit
R1# wr
Building configuration...
[OK]
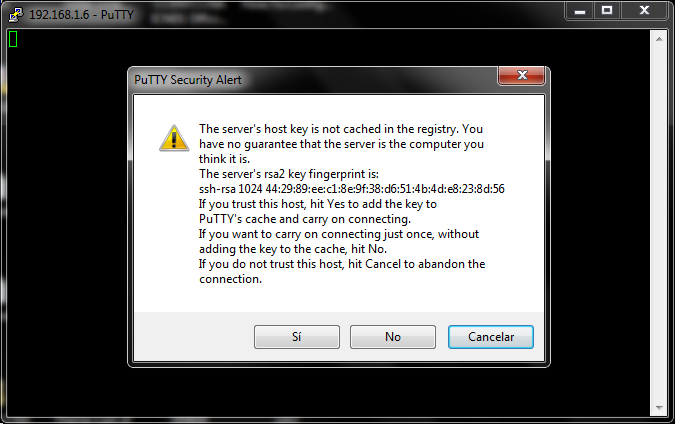
Iniciamos sesion SSH con PuTTY

login as: delfirosales
Using keyboard-interactive authentication.
Password:

R1> enable
Password:
R1#
R1# show ip int brief
Interface                  IP-Address      OK? Method Status                Protocol
FastEthernet0/0            192.168.1.1     YES manual up                    up
FastEthernet0/1            unassigned      YES unset  administratively down down
R1# conf t
Enter configuration commands, one per line.  End with CNTL/Z.
R1(config)# hostname delfirosales
delfirosales(config)# end
delfirosales# wr
Building configuration...
[OK]

SSH funcionando en GNS3.